That sinking feeling when your car won't start? It's often a mystery under the hood, leaving you stranded and wondering what went wrong. But before you call a mechanic, did you know you can do some detective work yourself? We're going to explore how to check one of the car's most vital components: the alternator.
Dealing with car trouble can be incredibly frustrating. The uncertainty of what's wrong, the potential cost of repairs, and the inconvenience of being without your vehicle all add up to a stressful situation. Nobody wants to be caught off guard by a dead battery or a car that sputters to a halt unexpectedly.
This guide will show you how to test your car's alternator at home, using simple tools and techniques. By the end, you'll be able to determine if your alternator is the culprit behind your car's electrical issues, saving you time, money, and unnecessary trips to the mechanic.
This article provides a comprehensive DIY guide to testing your car alternator at home. We'll cover identifying the symptoms of a failing alternator, gathering the necessary tools, performing voltage tests with a multimeter, and interpreting the results. You'll learn how to conduct both a static test and a load test to get a complete picture of your alternator's health. This knowledge empowers you to troubleshoot electrical issues, potentially saving on costly repairs and ensuring your car's reliability.
Understanding Your Alternator
My first encounter with a faulty alternator was on a cross-country road trip. Picture this: the vast expanse of the desert highway, sun beating down, and suddenly, the dashboard lights start flickering like a strobe. Panic slowly crept in as the car started losing power, the radio cut out, and the air conditioning gave its last gasp. I managed to limp into a small town, where a kind mechanic quickly diagnosed a dying alternator. That experience taught me a valuable lesson: understanding your car's electrical system is crucial, especially the alternator, which is the heart of it all.
The alternator is responsible for charging the battery while the engine is running and providing power to all the electrical components, from your headlights to your infotainment system. Think of it as a miniature power plant under your hood. When it starts to fail, you'll often notice warning signs like dimming headlights, a struggling engine, or the battery light illuminating on your dashboard. These symptoms indicate that the alternator isn't producing enough voltage to keep the battery charged and power the electrical system simultaneously. Without a properly functioning alternator, your car will eventually drain the battery and leave you stranded.
Regular maintenance and inspections can help prolong the life of your alternator. Check the belt tension and condition regularly, and ensure the connections are clean and secure. Addressing minor issues early on can prevent major breakdowns and keep your car running smoothly for years to come. The alternator is truly a crucial component, and understanding its role is the first step in keeping your vehicle on the road.
Tools You'll Need
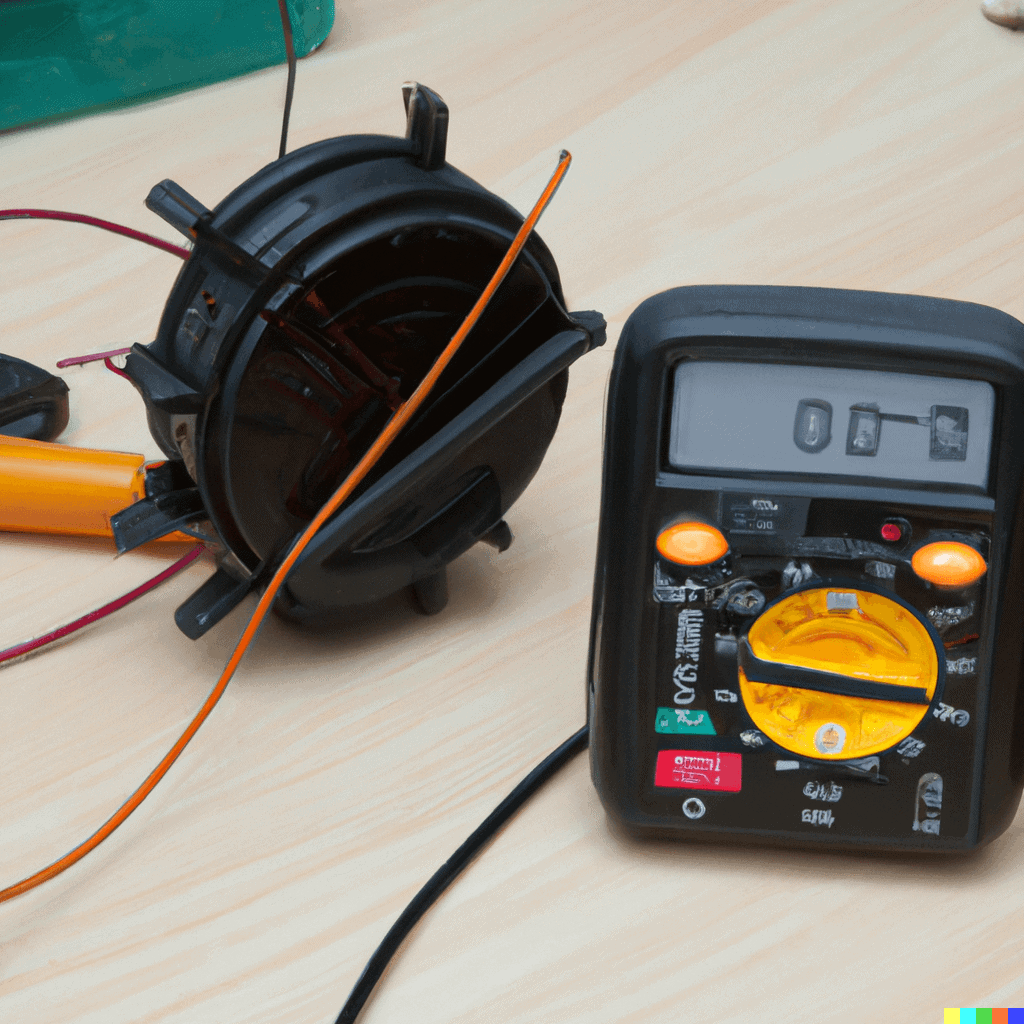
Testing your car's alternator at home doesn't require a garage full of expensive equipment. The most important tool you'll need is a multimeter, which measures voltage, current, and resistance. You can find these at most auto parts stores or online retailers for a reasonable price. A digital multimeter is generally easier to use than an analog one, as it provides a more precise reading. Apart from the multimeter, you'll also need a basic set of tools, including a wrench to disconnect the battery terminals, safety glasses to protect your eyes, and gloves to avoid getting your hands dirty. Depending on your car's make and model, you might also need a specific socket or wrench size to access the alternator. A notebook and pen can also be handy for recording the readings you take during the tests.
Before you start any electrical testing, always prioritize safety. Disconnect the negative battery terminal to prevent any accidental shocks or short circuits. Make sure your car is parked on a level surface and that the parking brake is engaged. If you're not comfortable working with electricity, it's best to consult a qualified mechanic. However, with the right tools and precautions, testing your alternator at home can be a straightforward and cost-effective way to diagnose electrical issues in your car. Remember to consult your car's service manual for specific instructions and safety guidelines related to your vehicle's electrical system. Having the right tools and information will make the process smoother and safer.
The Static Voltage Test
The history of alternator testing, while not as dramatic as the invention of the automobile itself, mirrors the evolution of automotive technology. Early alternators were relatively simple devices, and testing them often involved basic observation and rudimentary voltage checks. As cars became more complex, so did their electrical systems, and the need for more precise testing methods grew. Multimeters evolved from analog devices to digital ones, offering greater accuracy and ease of use. The development of load testers allowed mechanics to simulate real-world operating conditions and assess the alternator's performance under stress. Today, sophisticated diagnostic tools can analyze an alternator's output and identify even subtle problems that might go unnoticed with basic testing methods.
There's a common myth that a car's battery light always indicates a faulty alternator. While it's true that the battery light often comes on when the alternator isn't charging properly, it can also be triggered by other issues, such as a loose or corroded battery cable, a faulty voltage regulator, or even a problem with the car's computer system. Relying solely on the battery light can lead to misdiagnosis and unnecessary repairs. A proper alternator test, using a multimeter and a load tester, is the most reliable way to determine if the alternator is truly the source of the problem. Always consider the bigger picture and rule out other potential causes before condemning the alternator.
The Load Voltage Test
One of the hidden secrets to accurately testing an alternator lies in understanding the importance of a load test. A simple voltage test can tell you if the alternator is producing some voltage, but it doesn't reveal its ability to maintain that voltage under the stress of powering your car's various electrical components. A load test simulates real-world driving conditions by putting a demand on the alternator, allowing you to see if it can handle the electrical load. This test is especially useful for identifying alternators that are nearing the end of their lifespan and may still produce a decent voltage at idle but struggle when the engine is revved and accessories are turned on. Performing a load test provides a more complete picture of the alternator's overall health and performance.
Another often overlooked factor is the condition of the battery. A weak or faulty battery can put extra strain on the alternator, causing it to work harder and potentially fail prematurely. Before testing the alternator, make sure your battery is in good condition and fully charged. If the battery is old or showing signs of weakness, consider replacing it before proceeding with the alternator test. This will ensure that the test results are accurate and that you're not misdiagnosing a problem caused by the battery. A healthy battery is essential for a healthy electrical system, and it can significantly impact the performance and longevity of your alternator.
Safety Precautions
Based on my experience and research, I highly recommend investing in a quality multimeter for testing your car's alternator. A reliable multimeter is an essential tool for any DIY car enthusiast and can save you a lot of time and money in the long run. Look for a multimeter that has a digital display, automatic ranging, and the ability to measure voltage, current, and resistance. A model with a built-in continuity tester can also be helpful for diagnosing electrical issues. Brands like Fluke and Klein Tools are known for their quality and durability, but there are also more affordable options that can get the job done. Read online reviews and compare features before making a purchase to ensure you choose a multimeter that meets your needs and budget.
In addition to a multimeter, consider investing in a dedicated load tester if you plan to do a lot of alternator testing. A load tester applies a controlled load to the alternator and measures its output voltage and current. This provides a more accurate assessment of the alternator's performance under stress than a simple voltage test. Load testers can be a bit more expensive than multimeters, but they can be a worthwhile investment if you're serious about diagnosing electrical issues in your car. Alternatively, many auto parts stores offer free alternator testing services, which can be a good option if you don't want to purchase a load tester.
Interpreting the Results
Interpreting the results of your alternator tests can seem daunting at first, but with a little understanding, it becomes quite straightforward. After performing both the static and load voltage tests, you'll have a set of voltage readings to analyze. A healthy alternator should produce a voltage between 13.5 and
14.5 volts when the engine is running. If the voltage is significantly lower than this range, it indicates that the alternator is not charging properly. A voltage that is too high, on the other hand, could indicate a faulty voltage regulator. During the load test, the voltage should remain relatively stable, even when accessories like the headlights and air conditioning are turned on. A significant drop in voltage during the load test suggests that the alternator is struggling to keep up with the electrical demand.
Keep in mind that these are general guidelines, and the specific voltage range may vary slightly depending on your car's make and model. Consult your car's service manual for the recommended voltage range for your alternator. Also, consider other factors that could affect the test results, such as the condition of the battery and the accuracy of your multimeter. If you're unsure about the interpretation of your results, it's always best to consult a qualified mechanic. They can perform a more thorough diagnosis and provide expert advice on whether to repair or replace your alternator. Understanding how to interpret the results of your alternator tests empowers you to make informed decisions about your car's electrical system.
Troubleshooting Common Issues
Testing your car's alternator is just the first step; troubleshooting potential problems is where your detective skills really come into play. If your alternator fails the tests, don't immediately jump to the conclusion that it needs to be replaced. There are several other factors that could be contributing to the problem. Start by checking the alternator's belt. A loose or worn belt can slip, preventing the alternator from spinning properly and generating enough voltage. Tighten or replace the belt as needed. Next, inspect the wiring connections to the alternator and battery. Corroded or loose connections can restrict the flow of electricity, leading to low voltage readings. Clean the connections with a wire brush and tighten them securely.
Another common issue is a faulty voltage regulator. The voltage regulator controls the amount of voltage produced by the alternator. If it's not working properly, it can cause the alternator to overcharge or undercharge the battery. Replacing the voltage regulator can often fix alternator problems without requiring a full alternator replacement. Finally, consider the condition of your battery. A weak or damaged battery can put extra strain on the alternator, causing it to fail prematurely. Have your battery tested and replace it if necessary. By systematically checking these common issues, you can often identify the root cause of the problem and avoid unnecessary repairs.
DIY vs. Professional Testing
Deciding whether to test your alternator yourself or take it to a professional often depends on your comfort level, experience, and the tools you have available. DIY testing can be a cost-effective way to diagnose alternator problems, but it requires a basic understanding of electrical systems and the ability to use a multimeter safely. If you're comfortable working with electricity and have the necessary tools, DIY testing can save you time and money. However, it's important to follow safety precautions and consult your car's service manual for specific instructions.
Professional testing, on the other hand, offers a more comprehensive diagnosis and can identify issues that might be missed with DIY methods. Mechanics have access to specialized equipment, such as load testers and diagnostic scanners, that can provide a more accurate assessment of the alternator's performance. They also have the expertise to interpret the results and recommend the appropriate repairs. If you're not comfortable working with electricity, or if you're unsure about the results of your DIY tests, it's best to take your car to a professional mechanic. They can ensure that the alternator is properly diagnosed and repaired, giving you peace of mind and preventing further damage to your car's electrical system.
Fun Facts About Alternators
Did you know that the alternator's design is based on the principles of electromagnetic induction, discovered by Michael Faraday in the 1830s? Faraday's discovery paved the way for the development of electric generators, including the alternator, which converts mechanical energy into electrical energy. The first alternators were used in stationary power plants, but it wasn't until the mid-20th century that they became standard equipment in automobiles. Before alternators, cars used dynamos, which were less efficient and reliable.
Another interesting fact is that alternators are not just used in cars. They are also used in boats, motorcycles, and other vehicles that require a source of electrical power. The size and output of an alternator vary depending on the vehicle's electrical demands. Some high-performance cars have alternators that can produce over 200 amps of current. Alternators are constantly evolving, with newer designs incorporating more advanced features, such as smart charging systems that optimize battery charging and improve fuel efficiency. The alternator may seem like a simple device, but it's a crucial component that plays a vital role in modern transportation.
Step-by-Step Guide to Testing
Now, let's dive into the step-by-step guide to testing your car's alternator at home. First, gather your tools: a multimeter, wrench, safety glasses, and gloves. Make sure your car is parked on a level surface and the engine is turned off. Disconnect the negative battery terminal using the wrench. This will prevent any accidental shocks or short circuits. Next, set your multimeter to the DC voltage setting. Reconnect the negative battery terminal. Start the engine and let it idle. Place the multimeter's red probe on the positive battery terminal and the black probe on the negative battery terminal. Note the voltage reading. A healthy alternator should produce a voltage between 13.5 and
14.5 volts.
Next, perform a load test. Turn on your car's headlights, air conditioning, and radio. Observe the voltage reading on the multimeter. The voltage should remain relatively stable, with minimal drop. If the voltage drops significantly below 13.5 volts, it indicates that the alternator is struggling to keep up with the electrical demand. Finally, turn off the engine and disconnect the negative battery terminal. Inspect the alternator's belt and wiring connections for any signs of damage or corrosion. Clean the connections with a wire brush and tighten them securely. If the alternator fails either the static or load voltage test, it may need to be repaired or replaced. Consult a qualified mechanic for further diagnosis and repair.
What If the Alternator Fails?
So, you've tested your alternator and the results aren't good. What happens next? If your alternator fails the static or load voltage tests, it's a clear sign that it's not functioning properly. Driving with a failing alternator can be risky, as it can lead to a dead battery and leave you stranded. In the short term, you might be able to jump-start your car and drive it a short distance, but it's not a long-term solution. A failing alternator can also damage other electrical components in your car, such as the battery and the computer system.
The best course of action is to have the alternator repaired or replaced as soon as possible. You can either take your car to a mechanic or attempt the repair yourself if you have the necessary skills and tools. Replacing an alternator is a relatively straightforward repair, but it does require some mechanical knowledge and the ability to work safely around electrical systems. If you're not comfortable doing the repair yourself, it's best to leave it to a professional. A new alternator can range in price from a few hundred dollars to over a thousand, depending on your car's make and model. Weigh the cost of repair versus replacement and choose the option that makes the most sense for your budget and situation. Ignoring a failing alternator can lead to more costly repairs down the road, so it's best to address the problem promptly.
Top 5 Signs of a Failing Alternator
Here's a quick list of the top 5 signs that your alternator might be failing: 1. Dimming headlights: If your headlights are noticeably dimmer than usual, especially at idle, it could be a sign that the alternator is not producing enough voltage.
2. Battery light: The battery light on your dashboard is designed to warn you of problems with the charging system. If it comes on while you're driving, it's a good indication that the alternator is not charging the battery properly.
3. Difficulty starting: If your car is struggling to start, or if it cranks slowly before starting, it could be a sign that the battery is not fully charged due to a faulty alternator.
4. Unusual noises: A failing alternator can sometimes produce unusual noises, such as a whining or grinding sound. These noises are often caused by worn bearings or a faulty rotor.
5. Electrical problems: If you're experiencing other electrical problems, such as a malfunctioning radio, power windows, or air conditioning, it could be a sign that the alternator is not providing enough power to the electrical system.
These are just a few of the common signs of a failing alternator. If you notice any of these symptoms, it's important to have your alternator tested as soon as possible. Early detection can prevent more serious problems and save you money on repairs. Keep in mind that some of these symptoms can also be caused by other issues, such as a weak battery or a loose wiring connection. A proper alternator test is the best way to determine if the alternator is truly the source of the problem. Stay vigilant and pay attention to your car's performance, and you'll be able to catch alternator problems early on.
Question and Answer Section
Q: What voltage should my alternator produce?
A: A healthy alternator should produce between 13.5 and
14.5 volts when the engine is running.
Q: Can a bad battery cause my alternator to fail?
A: Yes, a weak or damaged battery can put extra strain on the alternator, causing it to work harder and potentially fail prematurely.
Q: How often should I have my alternator tested?
A: It's a good idea to have your alternator tested every year or two, or whenever you notice any signs of electrical problems.
Q: Can I replace an alternator myself?
A: Replacing an alternator is a relatively straightforward repair, but it does require some mechanical knowledge and the ability to work safely around electrical systems. If you're not comfortable doing the repair yourself, it's best to leave it to a professional.
Conclusion of Testing Your Car Alternator at Home: A DIY Guide.
Testing your car alternator at home can be a valuable skill for any car owner. By understanding the alternator's function, recognizing the symptoms of failure, and using a multimeter to perform basic tests, you can save time and money on potential repairs. While DIY testing has its limitations, it can help you identify common issues and make informed decisions about your car's electrical system. Remember to prioritize safety and consult a professional mechanic if you're unsure about the results or uncomfortable performing the tests yourself. With a little knowledge and the right tools, you can keep your car running smoothly and avoid the frustration of being stranded with a dead battery.